

Installing Kali Linux VirtualBox Tutorial – HackingVision
Kali Linux VirtualBox Install Guide: Welcome to HackingVision in this tutorial we will be demonstrating how to install Kali Linux in a virtual machine (VM). Virtual Machines are emulations of a physical computer system. The most popular Virtual Machine emulation software on the market are Oracle VirtualBox and VMWare Workstation both are equally as good as emulating virtual computer systems the difference is VirtualBox is free and VMWare Workstation is paid software that requires a license code. For the purpose of this tutorial we are going to be using Oracle VirtualBox to install Kali Linux in a virtualized environment virtual machines can come in very useful as they can run outside your computers physical hardware environment by emulating its own hardware.
What Operating Systems (OS) is supported by VirtualBox: Windows, Linux, Macintosh, and Solaris hosts and supports a large number of guest operating systems including but not limited to Windows (NT 4.0, 2000, XP, Server 2003, Vista, Windows 7, Windows 8, Windows 10), DOS/Windows 3.x, Linux (2.4, 2.6, 3.x and 4.x), Solaris and OpenSolaris, OS/2, and OpenBSD.
Installing VirtualBox
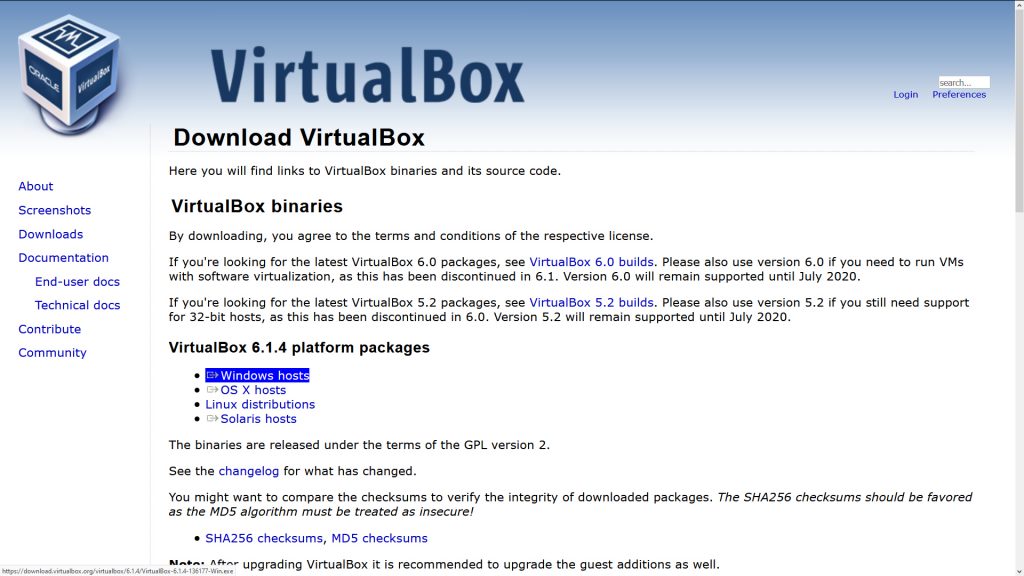
Go to https://www.virtualbox.org/wiki/Downloads download and install VirtualBox for your computer’s operating system if you are using Linux you can install VirtualBox by opening a command terminal and entering the command below.
sudo apt-get virtualbox
Downloading Kali Linux
Download your preferred version of Kali Linux from https://www.kali.org/downloads/
Alternatively, if you prefer HTTP download you can find Kali Linux downloads at http://cdimage.kali.org/
We noticed a couple of problems with the latest version of Kali Linux 2020.1a we don’t recommend installing this version at the minute. In this tutorial, we will be using kali-linux-2019.4-amd64.iso
Creating a new Virtual Machine
Virtual Machines are easy to create and run when you first open up VirtualBox you will see a welcome notice above this notice are buttons Preferences, Import, Export, New and Add to create a new virtual machine select the option New.

Choose a name for your new virtual machine.

Select RAM memory size for your new virtual machine. The recommended amount of memory for Linux virtual machines is 512MB since we are running a computer with 16GB of RAM we will give our new virtual machine 2871MB of RAM.

Next, we need to create a virtual hard disk for our new virtual machine.

Select how you want to store your new virtual machine you can choose either option. Dynamically allocated hard disk files will only use space on your computer’s hard drive as the virtual machines virtual hard drive fills up. Fixed-size hard disk files are a fixed-size the size of the full virtual hard drive will be stored on your computer it can take longer to create but can often be faster than dynamically allocated hard disk files. For the purpose of this tutorial, I will choose dynamically allocated option.

Set a file location where you would like to store your virtual hard drive and choose the amount of storage space you want to allocate to your virtual machine.

Now its time to add Kali Linux Install Disk iso as our disk file. Go to settings

Go to the storage option you will see a disk icon that represents our virtual disk drive this drive will act just like a CD/DVD ROM drive would in a physical computer. Next, go to the disk drop-down icon that is next to the Optical Drive drop-down menu. Click Choose a disk file…

A file browser window will open we need to add the Kali Linux operating system iso file we downloaded earlier in the first part of this tutorial.

Now that our Kali Linux install iso is added to our disk drive it will be shown under storage devices.

It’s time to start our virtual machine.

When our virtual machine starts for the first time with a virtual optical disk connected we will be asked to select a disk. Select Kali Linux from the drop-down menu.

We can now install Kali Linux to choose a graphical install if you prefer a non-graphical install select install. In this tutorial, I will be doing a Graphical Install.

Select a language for your virtual machine.

Select your location normally this should be the country where you live.

Now we need to configure our keyboard choose a keymap to use.

Kali Linux will now load components from its installation media.

Enter a hostname for your system typically your hostname should be a single word that identifies your system on the network.

Kali Linux will now ask us to configure the network by giving a domain name leave this option blank.

It’s time to choose a virtual hard disk to install Kali Linux on. Select the virtual hard disk that created earlier in this tutorial.

The installer will now ask how you would like to partition your disk in this tutorial we will use the option Guided – use entire disk this option is best for beginners you can also set up encrypted LVM Kali Linux install by choosing the option Guided – use entire disk and set up LVM if you want to encrypt your Kali Linux install with encryption passphrase.
Select Guided – use entire disk

Kali Linux can partition our virtual hard disk with a couple of different schemes All files in one partition (recommended for new users) option will add all of Kali Linux files in one partition on the virtual machines virtual hard disk. Separate /home partition option will separate the home partition by it is only recommend to use Separate /home partition if you are an advanced Linux user. Since this tutorial is aimed at beginners we are going to use option 1 All files in one partition (recommended for new users).
Select option All files in one partition (recommended for new users)

To finish partitioning and write changes to disk click continue.

Kali Linux will start installing on the virtual hard disk be patient it can take a little while to install.

Kali Linux allows a network mirror to be used click No and then click on continue.

Its time to install GRUB (Grand Unified Bootloader) at this stage Kali Linux will ask you if you would like to install GRUB to the master boot record on your first hard drive click on Yes this option is important as it’s impossible to boot a Linux install without a bootloader.


Now our Kali Linux install has competed we can boot into Kali Linux Operating System in our virtual machine.

To start a virtual machine in VirtualBox click on the machine and click Start

The virtual machine will not reboot into Kali Linux. Enter user typically the default username is root but has recently been changed to kali in version 2020.1 since we are using an older version of Kali Linux 2019.4 the default username for our Kali Linux system is root.

As you can see from the screenshot below Kali Linux has loaded perfectly. When we first install Kali Linux we need to update sources.list file this file is responsible for handling update repositories if we don’t update sources.list file with the correct repositories we won’t be able to update or upgrade our system.

Open up a new command terminal you can do this by selecting the terminal icon or by right-clicking and selecting open new terminal.
In the terminal enter command
nano /etc/apt/sources.list
This command will open up a list of sources update repositories in the Nano text editor. Nano is a command-line based text editor included in most Linux distributions.

In Nano editor delete contents of sources.list

Add Kali Linux Rolling repository to sources.list you can do this by adding the line below into sources.list file in Nano text editor from the command terminal.
deb http://http.kali.org/kali kali-rolling main contrib non-free
Your sources.list file should look like the one in the screenshot below.

When you have added Kali Linux rolling repository to sources.list we can save it and exit nano to do this use CTRL+O on your keyboard overwrite the file and use CTRL+X to exit the nano text editor.
Let’s check if we can now update the software in Kali Linux.
In a command, terminal enter the command below. This command will update and upgrade your Kali Linux virtual machine.
apt-get update && apt-get upgrade

Kali Linux will now download and install updates.

Installing VirtualBox Guest Additions (Optional)
In order to use our Kali Linux virtual machine in full resolution, we need to install VirtualBox Guest Additions.
We can install VirtualBox Guest Additions by opening up a command terminal and entering the command below.
sudo apt install -y virtualbox-guest-x11
Once VirtualBox Guest Additions has installed reboot your Kali Linux virtual machine.

We hope you enjoyed reading this tutorial thanks for coming to our website at this stage we recommend that you read our guide on getting started in Kali Linux.
Learn Kali Linux The Easy Way Getting Started With Kali Linux